
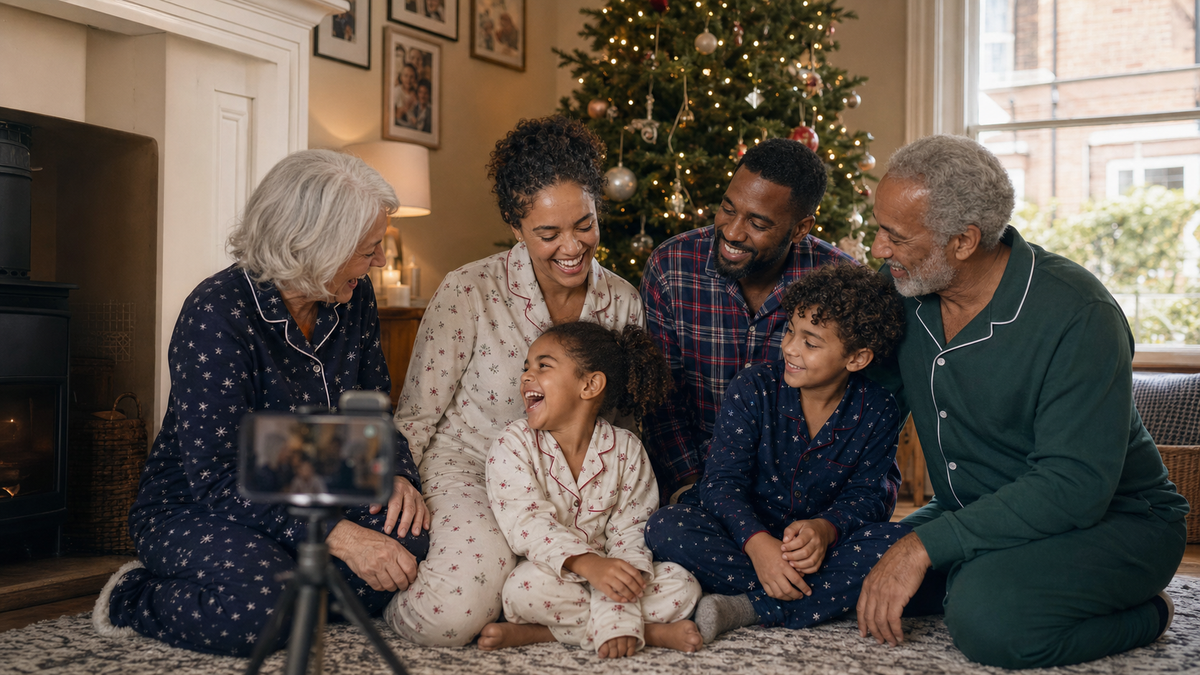
The family Christmas photograph people keep is rarely the one where everybody sits perfectly still. It is usually the frame just before or after: somebody laughing, a child looking at a grandparent, wrapping paper underfoot or a pet walking through the shot.
You do not need a studio or specialist camera to take a warm Christmas photo at home. A window, a phone timer and a little preparation are enough. These twelve practical ideas help the photograph feel connected without turning the morning into a formal photoshoot.
1. Choose the room before choosing the pose
Look for the place where the family can gather without squeezing into a narrow line. A sitting room near the tree, a bedroom with soft window light or a kitchen table after breakfast can all work.
Clear only the distractions that pull attention from faces: shopping bags, bright packaging, charging cables and anything with large lettering. Keep a few signs of real life. Blankets, books and a little wrapping paper help the picture belong to your house.
2. Use window light whenever possible
Face people towards a window or place the window slightly to one side. This creates softer light across faces than a ceiling light directly overhead.
Turn off harsh mixed lighting if it gives skin an orange or green cast. Tree lights can stay on for atmosphere, but they should support the faces rather than being the only light in the room.
3. Photograph earlier than you think
Winter daylight fades quickly in the UK. If the photograph matters, take it while useful window light is still available. On Christmas morning, photograph before the room becomes busy and before the youngest people have lost patience.
Prepare the phone, tripod and clothing the evening before so the picture does not delay breakfast.
4. Coordinate clothing without making everyone identical
A family photograph looks connected when colours repeat across the group. Matching pyjamas are an easy way to do this, but exact copies are not essential. Choose two or three related shades and repeat them through checks, piping, tops or trousers.
For example, Fir & Tartan offers selected Evergreen, Crimson and Midnight choices that can coordinate across one scene. A more graphic print such as Starlit Spruce can carry the photograph while the background remains simple.
Avoid clothing with unrelated large logos or lettering. Check every person's size using the supplier measurements before the planned photograph. Our UK matching family pyjama guide explains how.
5. Put the camera at eye level
A phone placed too low can make the nearest knees and feet dominate the frame. Position it close to the eye level of the seated group, then tilt only enough to include everyone.
Use a stable tripod, shelf or stack of books. Check that the phone cannot slide, especially around children and pets. Clean the lens before starting. A fingerprint can make every tree light look foggy.
6. Use the rear camera and a timer
The rear camera on a phone often produces a clearer image than the front camera. Set a timer long enough for the photographer to return to the group without rushing.
Take a short burst or use a remote shutter if your phone supports one. Several frames increase the chance of catching open eyes and a natural expression without repeating the whole setup.
7. Give everybody something to do
People become self-conscious when the only instruction is to smile. Create a small action instead:
- Open one present together.
- Pour tea or pass a plate of toast.
- Read the first page of a favourite Christmas book.
- Ask the children to tell a joke.
- Let a grandparent show an old decoration.
Photograph the action, then keep taking pictures for a few seconds after it ends. That is often when shoulders relax and the real expressions arrive.
8. Build the group in triangles, not a straight row
Seat some people and let others kneel, lean or stand behind them. Keep heads at different heights and bring shoulders close enough to show connection.
Place the youngest children where they feel secure rather than in the mathematically perfect centre. If a child wants to sit on a familiar adult's lap, use that relationship as the shape of the picture.
9. Let children and pets set part of the pace
Take the essential group photograph first. Young children and animals may not wait while adults adjust every detail.
For pets, choose a safe position and ask one person to hold a treat near the camera only when everybody else is ready. If the pet walks away, take the picture anyway. A moving tail or unexpected entrance may become the part everybody remembers.
10. Take one wide photograph and several close details
The wide photograph records who was there and what the room looked like. Detail shots complete the story.
- Hands opening a card.
- Small feet beside adult slippers.
- A cup near the tree.
- A child leaning against a grandparent.
- The untidy sofa after the formal picture.
These images work well together in an album and reduce the pressure on one frame to contain the entire morning.
11. Check the background edges
Before the timer starts, look around the outer edge of the screen. Move objects that appear to grow from behind somebody's head, crop half a person or create a bright distraction.
Leave a little space around the group so the photograph can be cropped for a card, frame or social post later. Avoid placing important faces close to the edge.
12. Finish with the photograph nobody has to pose for
Once the planned picture is complete, leave the camera ready for a few minutes. Ask everyone to look at one another, talk about breakfast or inspect the photographs already taken.
The last frame may be less symmetrical, but it can hold more of the morning. Morrow & Fold calls this the family archive: ordinary scenes that become valuable because the people in them do.
A five-minute family photo setup
- Choose a position near a window.
- Clear strong distractions from the background.
- Place the phone securely at seated eye level.
- Turn on the timer or remote shutter.
- Take one looking-at-camera frame.
- Give the group a simple action and keep shooting.
- Check focus and faces before everyone moves on.
Frequently asked questions
What is the best time to take Christmas photos indoors?
Use the brightest useful window light available in your room. In the UK winter, this usually means planning for daytime rather than relying on tree lights after dark.
Do family Christmas pyjamas need to match exactly?
No. Repeated colours and related patterns can create a coordinated picture. Mixing two or three shades often feels more personal than giving everybody the same look.
How do I take a family photo when nobody can hold the camera?
Secure the phone on a tripod or stable surface and use the timer, burst mode or a compatible remote shutter. Test the framing with one person before gathering the whole group.
How can I make children smile naturally?
Replace the instruction to smile with a small action, story or joke. Photograph their response rather than waiting for a fixed expression.
Should the Christmas tree be in the centre?
No. The tree can sit to one side as context. Faces should remain the clearest and most important part of the image.
Take the photograph, then let the morning continue. The value is not in making the room look flawless. It is in keeping a record of who was there.

Leave a comment
This site is protected by hCaptcha and the hCaptcha Privacy Policy and Terms of Service apply.